Friday, August 20, 2010

Herbs and Spices

Today begins a series on Herbs and Spices. We'll start by discussing the differences of the two.

Herbs

Herbs are plants, but not all plants are herbs. An herb is a portion of a plant that can be useful as food, flavoring foods or as medicine with a therapeutic effect. Herbs are traditionally aromatic, as well as flavorful. Many herbs are mentally uplifting or have a physical effect. Lavender, for example, is aromatic and assists one in falling asleep. Rosemary is great for flavoring, is a powerful and fresh fragrant and is useful in treating poor circulation.

Herbs are very easy to grow in your own garden. Even this late in the season, you too can plant some herbs. Herbs should be planted close to your kitchen to encourage use. You can also plant herbs in pots and keep them growing indoors on your kitchen windowsill or counter top.

Spices

Roots, seeds, or berries of particular plants are classified as spices. Some of the most common spices are pepper, ginger and cinnamon. Spices are typically used in cooking and for medicinal purposes. Digestive ailments and the support of the immune system seek the help of spices

Black pepper has been used since the 17th century for the treatment of digestive gas, colds and coughs, other chest ailments and the lack of appetite. Modern herbal medicine uses black pepper as a digestive stimulant and an antibacterial remedy.


Try this seasonal and delicious recipe using my all time favorite herb.

PASTA WITH FRESH BASIL, TOMATO, AND
PARMESAN


12 oz. crinkled curls or other type of pasta
1/4 c. olive oil
2 tbsp. freshly squeezed lemon juice
1 1/2 c. firmly packed chopped fresh basil
3 c. chopped very ripe Italian plum tomatoes
3/4 c. freshly grated Parmesan cheese
Salt
Freshly ground black pepper
Fresh basil leaves for garnish

Cook pasta in 4 quarts boiling water until very al dente. Drain and toss with olive oil and lemon juice. Cool to room temperature, occasionally stirring the pasta to coat thoroughly. Add chopped basil, tomatoes, cheese, and salt and pepper to taste to the pasta. Mix thoroughly but gently. Garnish with basil leaves.

Recipe courtesy of Cooks.com

Monday, August 16, 2010

Time to Pack their Lunch


With September come the end of summer and the beginning of school for many families. Shopping for school supplies has been completed and now you have about 150 days to create exciting and nutritious lunches your child will want to eat. Don’t start this school year off dreading this daily chore. With a little planning and your child’s involvement, packing lunches may not be so daunting this school year.
Here are some lunchbox tips and ideas, which may make your child the envy of the lunch room.
1. Right from the beginning, check with your school for any policies on food allergy restrictions. Many schools have a “no nut” policy. This will rule out including any peanut butter sandwiches in your child’s lunch pail.
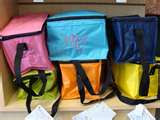
2. Food safety is a must. Make sure you have a thermos to keep hot foods hot. Frozen juice boxes or small ice packs placed in a thermal lunch box will keep cold food at the right temperature until lunch time.
3. Remember that your child may only have 15 to 20 minutes to actually sit and eat their food. Pack a lunch that is easy to eat, packed in easy to open containers and requires little prepping, like peeling fruit. Do the prep work ahead of time for your child.
4. Don’t include a food that your child has not ever eaten before. The opportunity to refuel midday is important to your child’s academic success. Take every opportunity to include foods your child is familiar with and will eat during lunch break. Save the introduction to new food items for the weekend or dinner time.
5. If you want to ensure your child will eat their lunch, include them in the planning process, purchasing and packing of their own lunch. Take them along to the grocery store to make food selection; have them help assemble a sandwich or place items in their lunch box.
6. Include small foods. Small foods are more fun for a child to eat. Avoid a whole sandwich; instead cut sandwiches into smaller pieces. They are easier for your child to eat and more fun too. Baby carrots, fruit slices, dried fruit etc. make good lunch items. Pack items in mini muffin cups and wrap in foil or plastic wrap. You can include more choices if the quantity is smaller.
7. Include a variety of tastes and texture to make the lunch satisfying. Include crunchy, salty, sweet and savory foods in each lunch. The crunch of a carrot stick, the saltiness of a whole grain pretzel, and the sweetness of a peach will make for a satisfying lunch.
8. Consider a variety of bread products if sandwiches are a daily fare. Whole grain breads, like whole wheat, 12 grain, and rye or oat bread make for a good variety and are healthy choices.
9. Consider dips and spreads instead of sandwiches each day. Salsa, humus, bean or fruit dips make a nice alternative to sandwiches. Pack crackers, mini bagels or bagel chips, tortillas, baked tortilla chips rice crackers, mini muffins, pita bread or mini croissants make for good dipping.
10. Avoid high cost, high fat and low nutrient foods like Lunchables. While these are appealing to children, they are not very nutritious and can be tough on your budget. You can pack a more nutritious lunch or snack yourself using the ideas already mention above.
11. If your child wants the same thing day after day go ahead and pack it. If you know that the lunch is nutritious and your child is eating it, there is no harm in eating the same thing each day. Children don’t like change and a new school year will bring on enough stressful changes in your child’s life.
12. Remember whenever possible to include something special in your child’s lunch box. A homemade cookie, a sticker, pencil, a handwritten note or a little change to purchase chocolate milk or an ice cream sandwich will make for a nice surprise. A special treat will encourage your child to dig into their lunch box each day.

For more helpful tips on packing a healthy and desirable lunch check out the following web sites.

http://justbento.com/handbook/downloads/weekly-bento-planner

www.school-lunch-ideas.com

Wednesday, July 14, 2010

Corn on the Cob


It's finally Corn on the cob season! Just about this time in July, corn on the cob becomes a main ingredient in many of our daily dinners. The season seems so short, that we don't seem to tire of having corn several nights throughout the week.
Did you ever wonder how corn grows? Here are some interesting facts on the growth of corn.

Sweet corn is pollinated by wind movement. Pollen is deposited at the tassels at the top of the corn stalk and drops onto each tip of the developing silks and corn cob. Each strand of silk gets pollinated by pollen dust from the tassels and each pollinated silk forms a kernel of corn on the ear. During the tassel stage, corn plants must receive adequate rainfall (or irrigation water) for the kernels and ears to form. This is the most critical period for corn development. During a drought, corn planted in rows will "pineapple", (that is curl up and resemble pineapple leaves) to conserve moisture.

So pray for rain so we don't have a "pineappling" corn crop.

Ways of cooking corn:

I am sure you have probably boiled your corn on the cob as a way of preparing it. But this summer why not give grilling a try. You don't need to have a gas grill or even a charcoal grill to prepare your corn in this fashion. A grill pan will work if that is all you have. Here are the steps for grilling corn:

1. Select corn that has plump kernels
2. Fill your kitchen sink with a few inches of water and submerge your corn still with the husk in tack into the water. Let is soak for about 10 minutes.
3. If you will be using your gas or charcoal grill, now is the time to prep the grill
4. After soaking corn for a minimum of 10 minutes, remove corn from the water and wrap them in a towel, to absorb excess water.
5. Place the corn on your grill and cook for 10 minutes, turning frequently to avoid over charring any one side of the husk
6. Remove corn from the grill.
7.You may want to have gloves on at this point, as the corn is hot. Remove the husk and silk from the corn.
8. Corn is now ready to eat.

For a new and delicious twist on buttered corn, trying this Lime Butter recipe.


LIME BUTTER

Serves 6

4 tablespoons butter, room temperature
1 teaspoon lime zest
2 teaspoons fresh lime juice
1/2 teaspoon ground black pepper


Directions
In a small bowl, beat together all ingredients until well blended.

Serve with hot corn on the cob

Thursday, July 8, 2010

The Things that bring me joy

Ah the joys of summer! With temperatures soaring above 100 degrees this week, I haven't felt that joyful. I've been down right hot and lazy. But when the temperatures drop down within their normal ranges I am going to get back to pursuing the things that bring me joy in the summer. Here's my list:

1. The sound of cicadas humming in the night.
2. Finding wild berries along the road side and picking them without breaking out with a case of poison ivy!
3. Watermelon! Oh the wet and crisp sound of cutting into your first ripe watermelon!
4. Picking berries with a friend. I have picked over 16 pounds of blueberries so far this summer.
5. Sitting out on my deck with the lanterns swinging on the tree branch after the sun has finally set.
6. Having friends over for a cook out.
7. All the wonderful produce I just can't seem to get enough of.
8. Trips to the farmers market several times a week!
9. Getting corn silk stuck in my teeth after eating a delicious ear of corn. (Still haven't found the best corn yet. Perhaps the lack of rain is the problem.)
10. Early morning walks while there is still dew on the grass and taking in all of the wonderful smells of summer- like honeysuckle and fresh cut grass.

Here is a recipe I have made numerous time this summer. Wherever I take this dish, compliments and smiles come my way. Try it, you won't be disappointed.


Nappa salad

Mix together the following ingredients:
2-2 1/2 pounds (1 large head) Nappa cabbage, cut up
3-4 scallions, sliced thin
1 small head of Radicchio lettuce ( or you may use something else of color like red cabbage, sliced red peppers etc.)

Mix together the following ingredients:
2-3 T melted butter
1/2 cup sliced almonds, slightly toasted
1 cup unsalted sunflower seeds
2 pkg. Ramen noodles, broken up (discard the flavor packet)

Dressing:
1/2 c white vinegar
1/2 cup oil
1/4 cup sugar
3 T soy sauce

Toss everything together. Taste great if left to marinate overnight.
For variety, add other items such as: cucumbers, shredded carrots, or grilled chicken to make a complete meal.


Enjoy!

What brings you join? Leave a comment to share your summer joys!

Tuesday, June 22, 2010

Looking to make a new friend this summer?


New friendships and relationships are right at your fingertip when you become a regular visitor to your local farmers market! As you meander your way around your local market don’t just admire the produce, make conversation with the local farmers from your community. You will be making an invaluable investment to your community when you do so! If you are like me, you want to support the business of your neighbors next door. When we buy from local farms we make an investment in the tax base in our own town. Purchasing locally grown foods benefits our local community, thus making it sustainable.


Visiting your local farmers markets can broaden your horizons in several ways. You may make a new friend with a local farmer, gain new knowledge about produce you may not have seen or tasted before and you may learn to make a new dish, thus expanding your culinary repertoire. Here are some ideas to make your next visit more rewarding:


1. Know what is in season. This week look for peas, cherries, blueberries (because of the early and abundant spring rain and warm temperatures blueberries are ready a few weeks earlier this summer), beans, lettuce, radishes and perhaps strawberries.


2. Decide which of the “in season” produce your family most enjoys. Also consider trying one that you have yet to eat and be willing to give it a try.


3. If you are not an experienced cook, before leaving home, select a recipe using the produce you have decided to purchase and prepare a list of the ingredients you will need.


4. When at the market here is your chance to have a conversation with the local farmers. Ask for their help, suggestions, recipe idea etc. Just enjoy yourself.


5. Once you have made your purchases and brought your produce home, keep it fresh.
a. Spinach, salad greens etc should be washed, patted dry and kept in the refrigerator until you are ready to use it.
b. Berries should not be washed until you are ready to eat them, as prewashing will encourage mold and spoil the fruit faster.
c. If the fruit you purchased seems very ripe, eat it immediately or keep in refrigerator to slow down the ripening process. Note that some fruit, like peaches, will not fare well in the refrigerator, which causes them to become mealy. Leave them on the counter for best results.

6. If you end up purchasing more than you can immediately use or just want to preserve summer’s bounty for those cold winter months:
a. Preserve berries by making jams and jellies.
b. Freeze berries by laying them in a single layer on a cookie tray. When berries have frozen place them in a zip lock freezer bag, return berries to the freezer to be enjoyed in the cold winter months.
c. Preserve stone fruit, like peaches and nectarines, by canning or freezing them. If you have never canned before and would like to learn how, contact your local Extension office for a class near you.
http://www.csrees.usda.gov/Extension
http://www.uga.edu/nchfp/index.html
d. Share your purchase with a friend!
e. If time just escapes you and your produce spoils before you are able to eat it, then by all means- Compost it! Don’t have a compost bin? Start one. Check out this site to get you started. http://eartheasy.com/grow_compost.html


7. Add a few new cookbooks or cooking magazines to your library to keep meals fresh and exciting for your family. Some of my favorites include:
a. Simply in Season by Mary Beth Lind and Cathleen Hockman-Wert http://store.mpn.net/productdetails.cfm?PC=1298
b. Eating Well magazine http://www.eatingwell.com
c. Cooking Light magazine http://www.cookinglight.com

Enjoy this wonderful food season!

Monday, June 14, 2010

Three Sisters! Not what you think.

There has long been an Indian custom surrounding the Three Sisters. No, they are not 3 women, but 3 vegtables who provide protection and nutrients to each other.

According to the Iroqujois Native Indian Legend, corn, beans and squash are inseparable "sisters" who only grow and thrive together. This tradition of interplanting corn, beans and squash in the same mound, is a sophisticated and sustainable system that provides long-term soil fertility and a healthy diet. Growing a Three Sisters garden is a wonderful way to feel more connected to the history of this land, regardless of our ancestry.

Corn provides a natural pole for bean vines to climb. Beans fix nitrogen on their roots, improving the overall fertility of the plot by providing nitrogen to the following years corn. Bean vines also help stabilize the corn plants, making them less vulnerable to blowing over in the wind. Shallow-rooted squash vines become a living mulch, shading emerging weeds and preventing soil moisture from evaporating, thereby improving the overall crops chances of survival in dry years. Spiny squash plants also help discourage predators from approaching the corn and beans. The large amount of crop residue from this planting combination can be incorporated back into the mound at the end of the season, to build up the organic matter in the soil and improve its structure.

Corn, beans and squash also complement each other nutritionally. Corn provides carbohydrates, the dried beans are rich in protein, balancing the lack of necessary amino acids found in corn. Finally, squash yields both vitamins from the fruit and healthful, delicious oil from the seeds.

(Excerpts taken from Renee's Garden)


How do you plant a three sister garden?


Proper positioning of the seeds is key to a successful garden.


1. In late May or early June, select a spot for your garden. Hoe the ground and create mounds of dirt.Flattend the centerof your mound .

2. In the center of the mound, plant five or six corn kernels in a small circle.

3. After a week or two, when the corn reaches approximately 5 inches, plant seven or eight pole beans in a circle about six inches away from the corn kernels.

4. A week later, at the edge of the mound about a foot away from the beans, plant seven or eight squash or pumpkin seeds.

5. When the plants begin to grow, weed out all but a few of the sturdiest of the corn plants. Keep the sturdiest of the bean and squash plants and weed out the weaker ones.

6. As the corn and beans grow, you want to make sure that the beans are supported by cornstalks, wrapping them around the corn. The squash will crawl out and between the corn and beans.

To learn more about this ancient Indian tradition you may want to visit the following website:

http://http//faq.gardenweb.com/faq/lists/teach/2003045238014436.html

http://http//horizon.nmsu.edu/kids/webquests/wqthreesisters_k.html

Saturday, June 5, 2010

Buzzing with the Bees!

If you want to learn how to work hard and play nice with others you may want to consult a bee colony. Today I suited up in a bee keepers garb and got up close and personal with a colony of bees. I was not at all afraid. With smoker in hand, we uncovered the bee house and entered the incredible world of bee life. There is so much going on in that little house, with thousands of drones tending to the Queen, new bees coming to life, honey being produced- it's incredible. If you are interested in learning more about bee colonies click on the following link.

Here are some facts about honey you may not have known before:
1. Honey has an antiseptic quality, so the next time you cut yourself don't run to the medicine cabinet, run to the kitchen instead. Smear a little honey on top of the abrasion and relief will soon follow.
2.If you have allergies, honey can be beneficial and if you eat honey that is local to your area, it may prevent your seasonal allergies. Bees use the pollen from local plants and eventually it ends up in your honey.
3. If your throat is sore, eat a little honey.
4. Want to wash and moisturize your face, use honey instead of Alpha hydroxy. It is great for sensitive skin.
5. There is evidence that honey diluted in water will help with your stomachaches and dehydration.
6. Burns, too, heal better with honey, studies show. The advantage of honey is that it not only prevents infections from occurring, it actually accelerates skin healing.
7. Honey may also be effective in the treatment of your ulcers. In Europe, honey has been used internally to help cure ulcers, particularly stomach ulcers.

Interested in it's nutritional properties?

Honey is composed of sugars like glucose and fructose and minerals like magnesium, potassium, calcium, sodium chlorine, sulphur, iron and phosphate. It contains vitamins B1, B2, C, B6, B5 and B3 all of which change according to the qualities of the nectar and pollen. Besides the above, copper, iodine, and zinc exist in it in small quantities. Several kinds of hormones are also present in it.

My recommendation to you is to visit one of your local farmers markets or produce stands and pick up a jar of local honey. It will serve you in so many ways. And remember honey never goes bad. If you have a jar tucked way back in one of your kitchen cupboards and it has become solid- no problem. Place the jar, lid removed, in your microwave and heat for 40 seconds or until honey has returned to a liquid state.

If you want a really exciting experience this summer, visit a local honey bee keeper and ask if you can suit up and visit with the bees. You won't regret it!